Electronics bench & ESP32
Your first electronics bench: soldering station, multimeter and ESP32 starter kit
Build a useful electronics bench with a controlled-temperature iron, CAT III meter, USB-C ESP32 boards and tools for wiring, soldering and checking your first project.
OUR PICKS / YOUR SETUP
Find your fit.
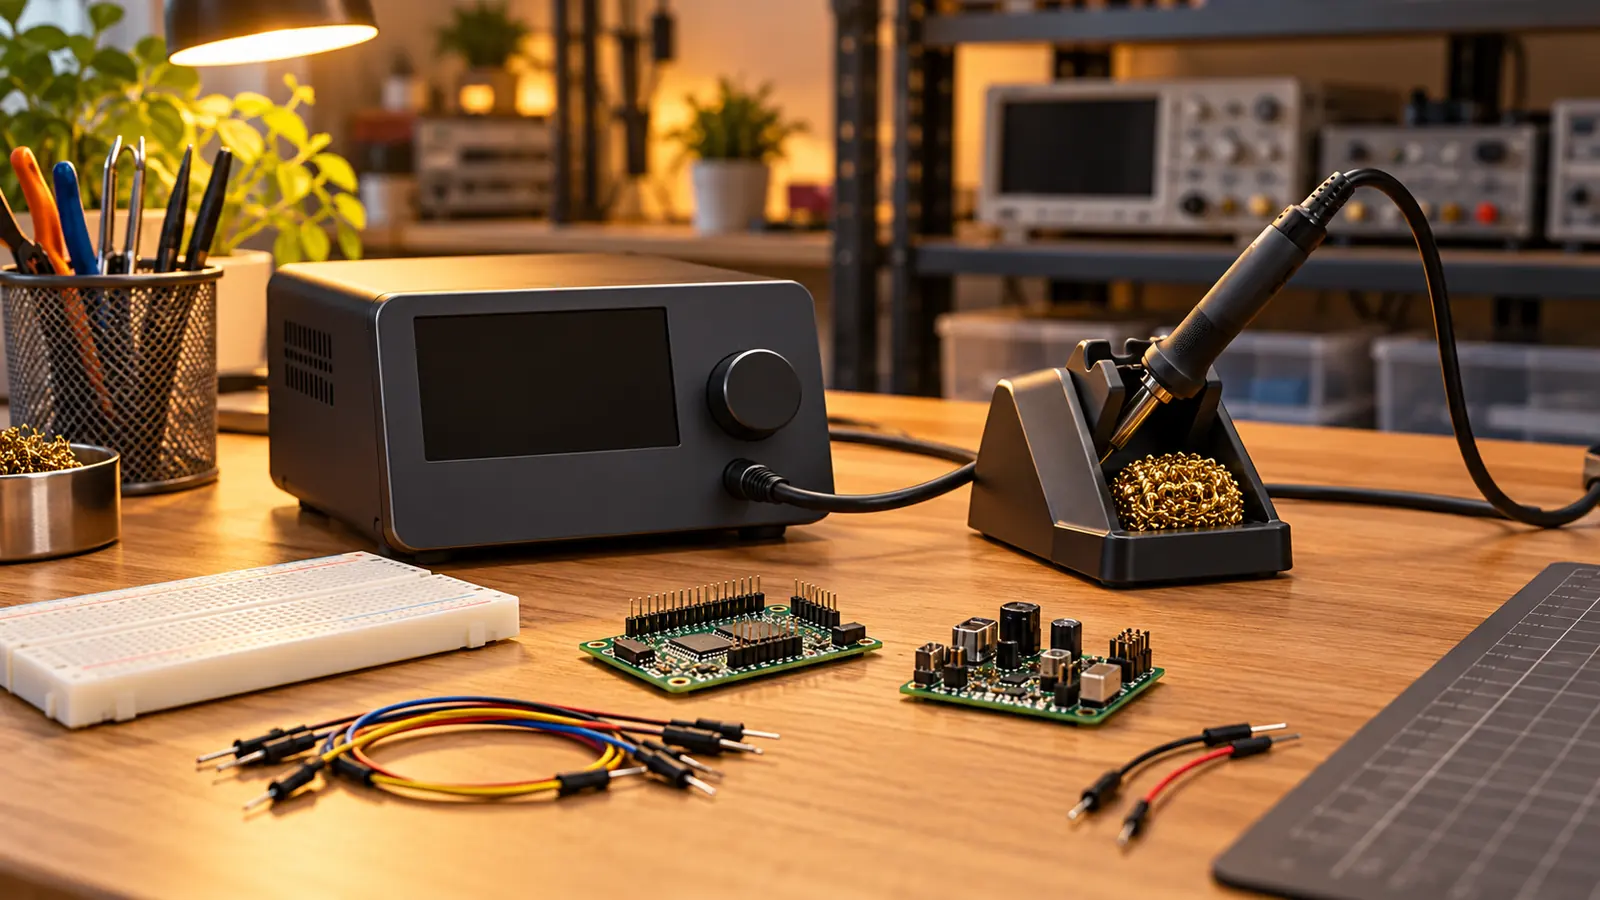
Choose Hakko FX888DX-010BY for controlled soldering, Fluke 101 for voltage and continuity, and the Seeed XIAO ESP32C3 three-pack plus ELEGOO component kit to prototype. Add QuadHands, solder, flux and a bench fume fan; the Hakko station includes brass cleaning wire.
- SolderingHakko · 65W iron
- MeasureFluke 101 · CAT III
- BuildXIAO · 3 USB-C boards
We earn a commission if you buy through our links — it doesn’t change our picks. How we make money → As an Amazon Associate I earn from qualifying purchases.
YOUR NEXT PROJECT / THE GEAR
Parts list
- Hakko FX888DX-010BYCheck price on Amazon
Set the tip temperature with a rotary dial; the holder and cleaning wire are included.
- MG Chemicals 4900-112G SAC305 solderCheck price on Amazon
Use electronics-grade SAC305 wire with a no-clean flux core for header and wire joints.
- MG Chemicals 8341-10ML flux pasteCheck price on Amazon
Add targeted flux when reworking a header or a joint that needs fresh wetting.
- Fluke 101 digital multimeterCheck price on Amazon
Check the board supply and trace connections with an autoranging voltage and continuity meter.
- QuadHands Standard Magnetic WorkBenchCheck price on Amazon
Position four magnetic arms around a board or cable so both hands can work.
- Seeed Studio XIAO ESP32C3, three-packCheck price on Amazon
Build small Wi-Fi and BLE projects with three documented ESP32-C3 boards and solder-on headers.
- ELEGOO EL-CK-002 Electronic Fun KitCheck price on Amazon
Prototype with the breadboard, jumper wires and small components before making permanent joints.
- Hakko FA400-04 smoke absorberCheck price on Amazon
Place a compact activated-carbon smoke absorber beside the soldering work as part of your ventilation setup.
The best upgrade to a box of loose boards is a bench where you can hold a wire still, make a clean joint and find out why the circuit won’t wake up. You don’t need a wall of instruments. You need a few tools that each have a job.
Start with the Hakko FX888DX-010BY for soldering, a Fluke 101 for voltage and continuity, and Seeed’s XIAO ESP32C3 three-pack for small Wi-Fi projects. Add the ELEGOO component kit to prototype, QuadHands to hold the work, and solder, flux and a fume fan to finish the bench.
Specifications and techniques from the makers; safety guidance from HSE, checked October 31, 2026.
This is the first stop in our Electronics bench & ESP32 section. The goal is useful little projects: a sensor, a repaired connector or a board ready for its printed case.
For a closer look at headers and small joints, choose a digital inspection microscope by screen, capture connection and tool clearance.
Buy by the job, not the tool count
| Job | Pick | What you get / why it belongs |
|---|---|---|
| Controlled heat | Hakko FX888DX-010BY | US 120V station; 65W iron, temperature dial, T18-D16 tip and holder |
| Make the joint | MG Chemicals 4900-112G | Lead-free SAC305 electronics solder, 0.81mm wire with a flux core |
| Rework a stubborn joint | MG Chemicals 8341-10ML | Targeted no-clean flux paste in a 10mL syringe |
| Find the connection | Fluke 101 | Autoranging voltage, resistance and continuity; maker-rated CAT III 600V |
| Hold the board | QuadHands Standard Magnetic WorkBench | Four movable magnetic arms on a steel base |
| Build the project | Seeed XIAO ESP32C3 three-pack | Three USB-C ESP32-C3 boards with separate solder-on headers |
| Try the circuit first | ELEGOO EL-CK-002 Electronic Fun Kit | Breadboard, jumpers and small components; no controller board |
| Move fumes at the bench | Hakko FA400-04 | Compact smoke absorber with a replaceable activated-carbon filter |
Keep your first projects at USB/low voltage, park the hot iron in its stand, and use lead-free electronics solder—flux still makes fumes. For regular soldering, use extraction that vents outside or a suitable HEPA-equipped solder-fume extractor, plus fresh air from an open window or a fan pulling air outside; follow HSE’s soldering guidance and our enclosure, fumes and power guide.
Soldering station: buy controlled heat and a proper holder
The FX888DX-010BY gives you a dial to set temperature and a display to see it. Hakko’s US product bulletin specifies closed-loop temperature control across 50–480°C, a 65W FX-8801 handpiece and an installed T18-D16 tip. The station’s 100W consumption rating is a different specification from the iron’s wattage.
That flat tip is a useful shape for header pins and wire joints. Set a working temperature for the solder and joint rather than turning the dial to its ceiling. Give the pad and pin heat together, then feed solder into the joint; a blob balanced on the iron is not the finished connection you want.
The included FH-800 holder already has A1561 brass cleaning wire and a sponge. Use that cleaner instead of adding a second brass pot to the shopping list. Clean the tip and leave it tinned between jobs. Hakko documents the included accessories in the same bulletin; MG Chemicals’ hand-soldering guide explains heat transfer, tip care and flux use.
Solder and flux: two different jobs
Choose MG Chemicals 4900-112G for the spool. Its SAC305 datasheet identifies lead-free, electronics-grade wire with a no-clean flux core. The 0.81mm diameter is the maker’s wire size; it does not tell you how much solder a joint needs. Feed a little, watch the joint form and stop before adjacent pins become one shiny bridge.
The flux inside the wire helps a new joint. The separate 8341-10ML syringe earns its place when you touch up a header or revisit a connection. Apply a small amount where you need fresh wetting, then reheat the joint.
MG’s 8341 datasheet says it works with lead-free alloys and lists cleaning as recommended. “No-clean” on the name is not a reason to leave a whole syringe’s worth under a connector. Follow the maker’s cleaning method for the assembly.
Meter: make voltage and continuity your first two habits
The Fluke 101 is the pick for those jobs. Fluke’s technical data gives it a CAT III 600V safety rating and lists voltage, resistance, capacitance, diode, frequency and audible continuity functions. Its manual shows autoranging operation. It has no current-measurement input; choose a different meter if measuring current is a requirement.
For a first board, use it in this order:
- Power disconnected: continuity. Put black in COM and red in the voltage/resistance jack. Touch the probes together, then trace a jumper and the breadboard’s connected holes. Learn which points share a connection before plugging in a board.
- Power disconnected: inspect your soldering. Look for joined adjacent pins, then use continuity where the circuit diagram says a connection should exist. A buzzer helps trace a net; follow the board’s pinout when interpreting what should connect.
- USB power connected: DC voltage. Switch out of continuity mode. Measure the board’s 3V3 rail relative to GND, with black on ground and red on the rail. Compare the reading with the maker’s pinout.
Now you have a sensible debugging question: is the problem power, wiring or software? That beats flashing the same firmware five more times and hoping the electrons notice.
When you want adjustable project power, our current-limited bench supply guide covers one versus multiple rails and a deliberate first connection.
Holder: stop asking your fingers to be a third hand
Choose the QuadHands Standard Magnetic WorkBench when you’re holding a board and a loose cable. The maker’s specification describes four flexible metal arms with magnetic bases, a 6 × 9-inch steel base and rotating clips. Move the arms around the base to suit the part rather than bending the project to suit the stand.
Hold the work by a clear edge or the cable insulation. Leave the pads and header row visible so you can approach them with the iron. For a header, seat the pins squarely, make one joint, inspect the alignment, then finish the row. It is much easier to fix one crooked joint than an entire crooked connector.
ESP32 kit: small boards with a clear identity
The XIAO ESP32C3 uses Espressif’s ESP32-C3 RISC-V chip, with Wi-Fi and Bluetooth LE. Seeed’s getting-started documentation covers its USB-C connection, external antenna, pinout and programming setup.
The maker’s three-pack contents are three boards and six separate seven-pin male headers: two strips per board. These are solder-on headers, so include that step before expecting to plug the board into a breadboard. You’ll also need a USB-C data cable for programming.
Use 3.3V-compatible GPIO circuits (ESP32-C3 electrical specifications), and keep USB/5V power pins separate from signal pins. Start with the board’s USB supply while learning the breadboard; leave the ELEGOO kit’s separate power module aside. The kit’s Arduino examples explain components, but their wiring and code need adapting to this ESP32 board.
Follow Seeed’s first-program instructions, then build one small circuit at a time. If your next project is a Bluetooth proxy, our ESPHome proxy guide has its own board recommendations and flashing route. Match that project before ordering extra boards.
Breadboard first, permanent wiring second
The ELEGOO EL-CK-002 adds the breadboard, jumper wires and small components that a bare development board does not supply. The official component-kit tutorial links the maker’s breadboard diagrams and component lessons. There is no UNO controller in this kit; your Seeed board is the controller for this bench.
Map the breadboard with the meter, keep power and ground wiring easy to follow, and photograph the working layout before moving anything. Once the circuit behaves, plan the final connectors and mounting holes. Our printed homelab parts guide covers useful brackets and fasteners; the 3D-printed radio-case guide shows how board, battery and connector positions drive the shell.
Fume fan: give it space beside the joint
The Hakko FA400-04 is a compact bench smoke absorber. Hakko’s maker-hosted catalogue documents its replaceable activated-carbon foam filter and vertical or horizontal positioning. Keep the inlet near the joint: its small carbon filter catches some smoke, but is not full fume control.
Arrange the holder, iron stand and fan before heating up. Then the session can be about making the connection, rather than shuffling hot tools around a crowded desk.
Where this bench takes you
A soldered header and a checked supply are a good first win. Next, choose a useful sensor project, fix a connector or make a small board fit a printed mount.
For off-grid messaging, move to the supported LoRa hardware in our Meshtastic starter-node guide and solar relay build. The XIAO’s Wi-Fi and BLE alone do not make it a LoRa radio. Your new bench supplies the tools; the project guide supplies the right circuit.
Put that XIAO and breadboard straight to work: build your first ESPHome temperature, motion and light sensor with a pin-by-pin wiring plan and ready-to-use YAML.
To check a supply without making your ESP32 the test load, use a DC electronic load for a controlled low-voltage draw.
When you need to see what a sensor and board are saying to each other, choose a USB logic analyzer for I2C, SPI and UART.
When a voltage reading leaves you wondering what happened between samples, choose a first oscilloscope for ESP32 rails and signals.
Sources & methodology
Where these facts come from.
- Hakko US product bulletin: 120V station, temperature control, handpiece and included holder · checked October 31, 2026
- MG Chemicals SAC305 solder wire datasheet · checked October 31, 2026
- MG Chemicals 8341 flux paste and cleaning guidance · checked October 31, 2026
- Fluke 101 maker CAT rating and measurement functions · checked October 31, 2026
- Fluke 101 manual: autorange, test leads and continuity · checked October 31, 2026
- QuadHands Standard WorkBench: magnetic arms, base and clips · checked October 31, 2026
- Seeed XIAO ESP32C3 getting started and pinout · checked October 31, 2026
- Seeed three-pack contents and separate headers · checked October 31, 2026
- ELEGOO official component-kit tutorial and datasheets · checked October 31, 2026
- Hakko maker-hosted catalogue: FA400 activated-carbon smoke absorber · checked October 31, 2026
- HSE solder-fume guidance · checked October 31, 2026
- MG Chemicals hand-soldering technique and tip care · checked October 31, 2026
- Espressif ESP32-C3 electrical specifications · checked October 31, 2026
Source dates are listed above.
As an Amazon Associate I earn from qualifying purchases.
YOUR NEXT PROJECT / THE GEAR
Parts list
- Hakko FX888DX-010BYCheck price on Amazon
Set the tip temperature with a rotary dial; the holder and cleaning wire are included.
- MG Chemicals 4900-112G SAC305 solderCheck price on Amazon
Use electronics-grade SAC305 wire with a no-clean flux core for header and wire joints.
- MG Chemicals 8341-10ML flux pasteCheck price on Amazon
Add targeted flux when reworking a header or a joint that needs fresh wetting.
- Fluke 101 digital multimeterCheck price on Amazon
Check the board supply and trace connections with an autoranging voltage and continuity meter.
- QuadHands Standard Magnetic WorkBenchCheck price on Amazon
Position four magnetic arms around a board or cable so both hands can work.
- Seeed Studio XIAO ESP32C3, three-packCheck price on Amazon
Build small Wi-Fi and BLE projects with three documented ESP32-C3 boards and solder-on headers.
- ELEGOO EL-CK-002 Electronic Fun KitCheck price on Amazon
Prototype with the breadboard, jumper wires and small components before making permanent joints.
- Hakko FA400-04 smoke absorberCheck price on Amazon
Place a compact activated-carbon smoke absorber beside the soldering work as part of your ventilation setup.
Prepared by Racks & Watts.