Electronics bench & ESP32
Your first ESPHome sensor: ESP32 + temperature, motion and light sensors in Home Assistant
Wire a XIAO ESP32C3 to SHT31 temperature/humidity, BH1750 light and PIR motion sensors. Follow the pin map, ESPHome YAML and Home Assistant setup.
OUR PICKS / YOUR SETUP
Find your fit.
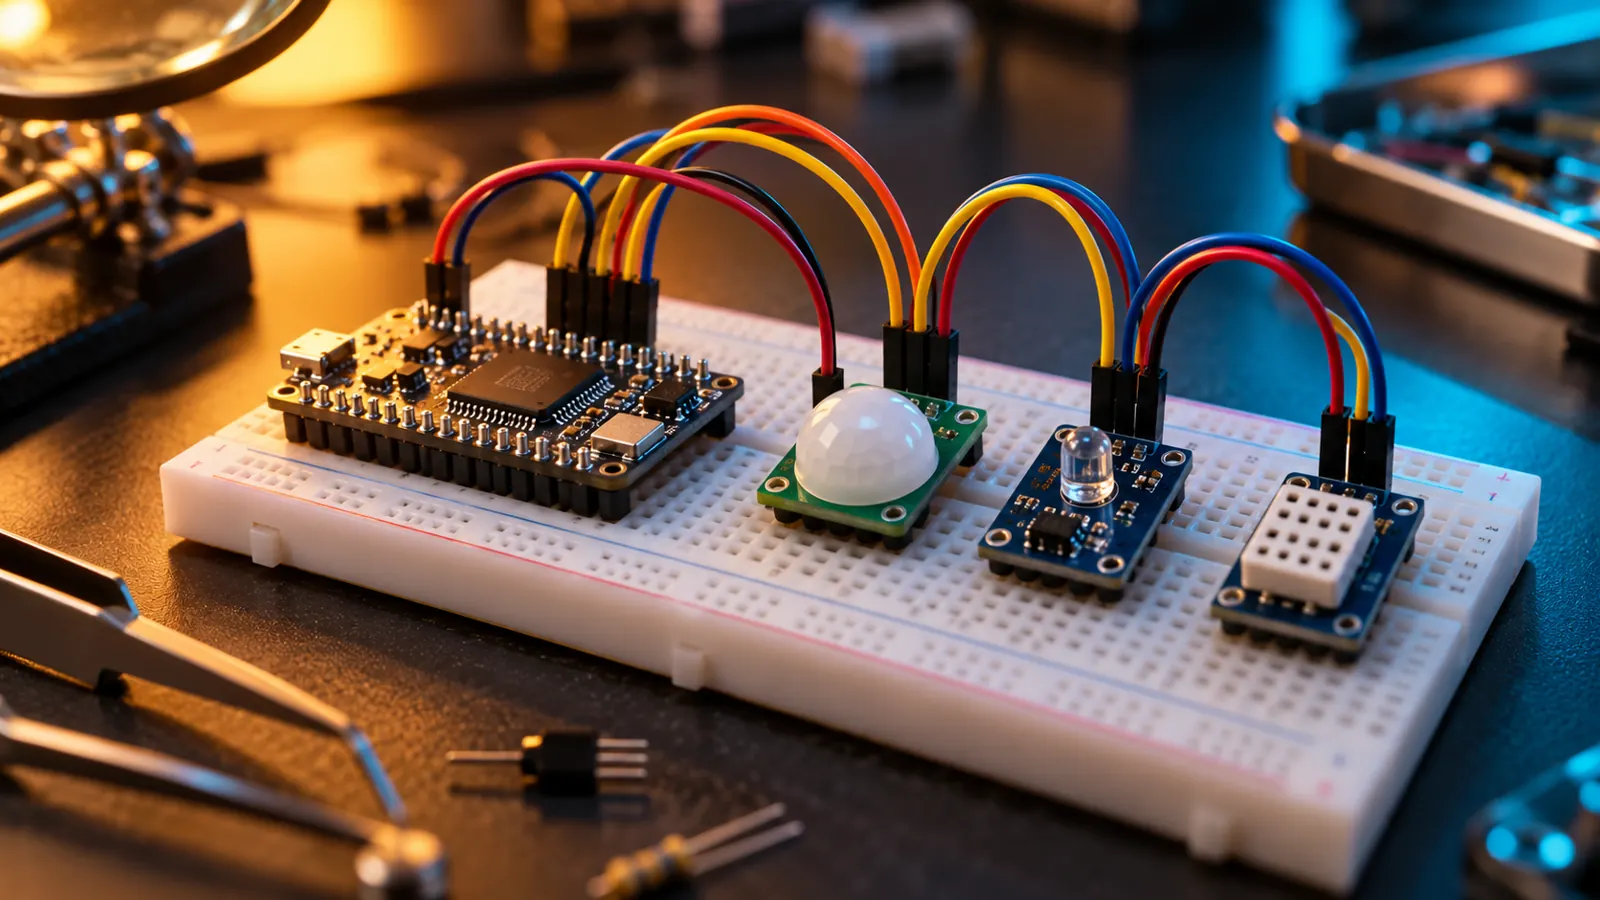
Build around one XIAO ESP32C3: use DFRobot SHT31 SEN0331 for temperature and humidity, ShillehTek BH1750 for lux, and HC-SR501 for motion. Reuse the ELEGOO breadboard and jumpers; flash ESPHome, then add the native integration in Home Assistant.
- BoardXIAO ESP32C3
- I²CGPIO6 SDA · GPIO7 SCL
- MotionGPIO3 · PIR input
We earn a commission if you buy through our links — it doesn’t change our picks. How we make money → As an Amazon Associate I earn from qualifying purchases.
YOUR NEXT PROJECT / THE GEAR
Parts list
- Seeed Studio XIAO ESP32C3, three-packCheck price on Amazon
Build small Wi-Fi and BLE projects with three documented ESP32-C3 boards and solder-on headers.
- ELEGOO EL-CK-002 Electronic Fun KitCheck price on Amazon
Prototype with the breadboard, jumper wires and small components before making permanent joints.
- DFRobot Fermion SHT31 (SEN0331)Check price on Amazon
Read temperature and humidity over the same two signal wires as the light sensor.
- ShillehTek BH1750 pre-soldered breakoutCheck price on Amazon
Get lux readings with a pre-soldered header and a simple I²C connection.
- ShillehTek HC-SR501 PIR motion sensorCheck price on Amazon
Add a motion signal you can read on one GPIO, with adjustable hold time.
Make a room sensor that you can actually change. Start with temperature and humidity, add a light reading, then give it a motion input. One little ESP32 sends all four entities straight to Home Assistant—and the next feature is a YAML edit away.
Use one Seeed XIAO ESP32C3, the DFRobot SHT31 SEN0331, a ShillehTek BH1750 light breakout and its HC-SR501 PIR. The ELEGOO breadboard kit from our first electronics bench guide supplies the breadboard and jumper leads. Already have those? Reuse them.
Specs and wiring from the makers; configuration from ESPHome and Home Assistant docs, checked October 31, 2026.
For adjustable power while debugging, the DC bench supply guide explains current limits and the XIAO’s external-power diode requirement; keep the USB-powered build here for your first run.
The parts, by job
| Job | Pick | Why it belongs here |
|---|---|---|
| Wi-Fi brain | Seeed XIAO ESP32C3 three-pack | Use one USB-C board for this project; save the other two for your next ideas. |
| Prototyping and wires | ELEGOO EL-CK-002 component kit | Breadboard and jumper/Dupont leads; leave its separate power module aside. |
| Temperature + humidity | DFRobot Fermion SHT31, SEN0331 | I²C breakout; power it from 3.3 V. |
| Light | ShillehTek pre-soldered BH1750 | Lux readings on the same I²C bus, with the header already fitted. |
| Motion | ShillehTek HC-SR501 | Adjustable hold time and a digital output; give it 5 V power. |
You also need an existing Home Assistant server, a USB-C data cable and a 2.4 GHz Wi-Fi network. This board talks over Wi-Fi, so you don’t need a Zigbee coordinator. Explore the Home Assistant hub if you’re still choosing a host.
The XIAO pack’s headers and the SHT31’s supplied header need soldering before you plug them into the breadboard or jumper sockets. The Seeed pack contents and DFRobot shipping list show the separate headers. Our bench guide covers the iron, holder and first joints.
The PIR detects movement. For lights that stay on while you sit still, explore a mmWave presence sensor as your next project.
Wire the XIAO C3 by its labels
Unplug USB while wiring; keep 5 V off the XIAO’s GPIO pins. Mount the XIAO across the breadboard’s centre gap so its two header rows stay separate. Use male-to-male leads between breadboard contacts and female-to-male leads from exposed sensor headers to the breadboard.
Two sensors share I²C: SDA carries data and SCL carries the clock. On this board, D4 is GPIO6/SDA and D5 is GPIO7/SCL. D1 is GPIO3, our motion input. Follow Seeed’s C3 pin map, not a pin diagram for a different ESP32.
| XIAO connection | Connect to |
|---|---|
| 3V3 | SHT31 VCC and BH1750 VCC |
| GND | SHT31 GND, BH1750 GND and PIR GND |
| D4 / GPIO6 | SHT31 SDA and BH1750 SDA |
| D5 / GPIO7 | SHT31 SCL and BH1750 SCL |
| 5V, supplied by USB | HC-SR501 VCC only |
| D1 / GPIO3 | HC-SR501 OUT |
| GND | BH1750 ADDR, selecting 0x23 |
Use the printed pin names on each breakout rather than assuming every three-pin connector has the same order. Leave the SHT31’s INT and RST pins unconnected for this build. You can distribute each supply through its own breadboard rail; keep the 3.3 V and 5 V rails separate and join all grounds.
The SEN0331 accepts 2.15–5.5 V; we use 3.3 V for both I²C boards. The BH1750 module has onboard pull-ups. The PIR needs a 5–20 V supply but outputs 3.3 V HIGH, so its OUT can go directly to GPIO3. Power the assembled build through the XIAO’s USB-C port.
Give it an ESPHome configuration
On Home Assistant OS, install ESPHome Device Builder through Settings → Apps → Install App, then select Start → Open Web UI. For Home Assistant Container, use the separate Device Builder install described in the official installation guide.
Choose Create device → New Device Setup, name it bench-sensor and select the ESP32-C3 board. Open Edit and use the configuration below. Keep your Wi-Fi credentials in secrets.yaml; put the wizard’s generated API encryption key there as bench_sensor_api_key, too. That key is a base64-encoded 32-byte key, not a password you invent. The native API documentation provides a key generator.
esphome:
  name: bench-sensor
  friendly_name: Bench Sensor

esp32:
  board: seeed_xiao_esp32c3
  framework:
    type: esp-idf

logger:

api:
  encryption:
    key: !secret bench_sensor_api_key

ota:
  - platform: esphome
    encryption:

wifi:
  ssid: !secret wifi_ssid
  password: !secret wifi_password

i2c:
  sda: GPIO6
  scl: GPIO7
  frequency: 50kHz
  scan: true

sensor:
  - platform: sht3xd
    address: 0x45
    temperature:
      name: Temperature
    humidity:
      name: Humidity
    update_interval: 60s
  - platform: bh1750
    name: Illuminance
    address: 0x23
    update_interval: 10s

binary_sensor:
  - platform: gpio
    pin: GPIO3
    name: Motion
    device_class: motion
Your secrets.yaml needs the three entries referenced above: wifi_ssid, wifi_password and bench_sensor_api_key. Keep that file private. The encrypted OTA configuration reuses the API key for future wireless firmware updates.
This DFRobot board uses 0x45, as shown in its SEN0331 example. ESPHome’s generic SHT3x example defaults to 0x44; the explicit address above matters. The BH1750 component uses 0x23. The two addresses let both sensors share the same wires.
Flash once, then add it to Home Assistant
- Attach the XIAO’s supplied antenna and connect its USB-C data cable to your computer. Use Chrome or Edge for browser flashing; follow ESPHome’s USB connection guide for the secure browser connection.
- Validate. In Device Builder, open the device’s overflow menu and select Validate. Fix any YAML errors before moving on.
- Install over USB. Select Install and the option for the device attached to your computer. Select its serial port and complete the first flash. On later edits, select Install again to send the new firmware wirelessly—Save alone doesn’t change the board.
- Watch Logs. Let it join Wi-Fi, then look for the I²C scan and the sensor readings. The scan should find
0x45and0x23with this wiring. - Add the integration. In Home Assistant, open Settings → Devices & services and add the discovered ESPHome device. Enter its API encryption key when prompted. If discovery doesn’t appear, choose Add integration → ESPHome and enter the device’s address and key.
- Name its area. Put Bench Sensor in the room where you’ll use it. Temperature, Humidity, Illuminance and Motion now belong to one device.
The ESPHome getting-started guide covers the Builder flow; the Home Assistant ESPHome integration connects directly through the native API.
Make the readings do something
First, prove each input is alive. Give the PIR about a minute to settle, set its jumper to H for repeat triggering and start with a short hold time. Walk across its view, then stand clear and let Motion return to clear. Shade the BH1750 and uncover it; allow its 10-second polling interval for each change. Temperature and humidity refresh every 60 seconds.
Now make a lamp welcome you into a dim room. This recipe uses an existing Home Assistant light:
- Open Settings → Automations & scenes → Create automation → Create new automation.
- Under When, add State changed for Bench Sensor Motion. Set From to
offand To toon. - Under And if, add Numeric state for Bench Sensor Illuminance. Set Below to a threshold chosen from your own bright-room and dim-room readings.
- Under Then do, add Light: Turn on, choose the lamp and Save.
Use Run actions to check the lamp action. Then dim the room, wait for Illuminance to update and for Motion to clear, and walk past the sensor. The state trigger starts the automation on movement; the numeric-state condition checks the light level at that moment. Add an off routine later, once the first half works.
Troubleshooting: fix one layer at a time
| Symptom | Next move |
|---|---|
| No USB serial port | Try a known data cable. Hold the XIAO’s BOOT button while connecting USB to enter download mode, then retry the installer. |
| Board stays offline | Check the Wi-Fi secrets and 2.4 GHz access; read the USB logs before changing sensor wiring. |
| Neither I²C sensor appears | Check common ground, 3V3 power and SDA/SCL against GPIO6/GPIO7. Recheck any split breadboard rails. |
Scan finds SHT31 at 0x44 |
Use the scanned address in YAML; its address jumper may be configured differently. Save and install again. |
| PIR is stuck or chatters | Check its 5 V supply, allow warm-up, shorten the hold time and move it away from changing heat sources. |
| HA finds it but cannot connect | Copy the API encryption key from this device’s secrets entry; use manual ESPHome setup if discovery is blocked. |
Keep the USB cable accessible while learning. It gives you a route back to logs and a fresh flash even when Wi-Fi isn’t cooperating.
Give the finished sensor some breathing room
Keep the temperature breakout away from the ESP32’s heat, leave the light sensor exposed to the room and give the PIR lens an unobstructed view. Prototype the placement before designing the box.
Use our printed homelab parts guide for mounts and inserts, or the printed radio-case guide for board-clearance and cable-exit ideas. Size the enclosure for this circuit. For the next project, head back to the electronics bench—you still have two XIAOs waiting.
Want to ask for the reading instead of opening a dashboard? Our local Assist hardware and setup guide adds a voice endpoint to your Home Assistant project.
If the wiring looks right but the sensor stays silent, capture and decode its I2C bus with a USB logic analyzer to see addresses and acknowledgements.
For a closer look at a supply rail or control signal, the first oscilloscope guide walks you through probe compensation and a low-voltage first session.
Sources & methodology
Where these facts come from.
- Seeed XIAO ESP32C3 pin map, power and USB boot · checked October 31, 2026
- DFRobot Fermion SHT31 SEN0331 specifications and pinout · checked October 31, 2026
- ShillehTek BH1750 wiring, addresses and pre-soldered header · checked October 31, 2026
- ShillehTek HC-SR501 power, 3.3V output, warm-up and trigger mode · checked October 31, 2026
- https://www.seeedstudio.com/blog/2024/08/05/xiao-3pcs-pack-limited-time-offer/ · checked October 31, 2026
- https://www.elegoo.com/blogs/arduino-projects/elegoo-electronic-fun-kit-upgraded-electronic-fun-kit-tutorial · checked October 31, 2026
- ESPHome SHT3x-D component and default address · checked October 31, 2026
- ESPHome BH1750 component and address · checked October 31, 2026
- ESPHome GPIO binary sensor · checked October 31, 2026
- ESPHome I2C pin configuration and scan · checked October 31, 2026
- ESPHome ESP32 board and framework configuration · checked October 31, 2026
- ESPHome encrypted native API · checked October 31, 2026
- ESPHome OTA platform · checked October 31, 2026
- ESPHome Device Builder first configuration and USB install · checked October 31, 2026
- Install ESPHome Device Builder · checked October 31, 2026
- Home Assistant ESPHome native integration and encryption key · checked October 31, 2026
- ESPHome USB connection, boot mode and browser requirements · checked October 31, 2026
- DFRobot SEN0331 example: default 0x45 address · checked October 31, 2026
- Home Assistant automation editor, actions and testing · checked October 31, 2026
- Home Assistant state trigger · checked October 31, 2026
- Home Assistant numeric-state condition · checked October 31, 2026
- DFRobot SEN0331 supplied header and specifications · checked October 31, 2026
Source dates are listed above.
As an Amazon Associate I earn from qualifying purchases.
YOUR NEXT PROJECT / THE GEAR
Parts list
- Seeed Studio XIAO ESP32C3, three-packCheck price on Amazon
Build small Wi-Fi and BLE projects with three documented ESP32-C3 boards and solder-on headers.
- ELEGOO EL-CK-002 Electronic Fun KitCheck price on Amazon
Prototype with the breadboard, jumper wires and small components before making permanent joints.
- DFRobot Fermion SHT31 (SEN0331)Check price on Amazon
Read temperature and humidity over the same two signal wires as the light sensor.
- ShillehTek BH1750 pre-soldered breakoutCheck price on Amazon
Get lux readings with a pre-soldered header and a simple I²C connection.
- ShillehTek HC-SR501 PIR motion sensorCheck price on Amazon
Add a motion signal you can read on one GPIO, with adjustable hold time.
Prepared by Racks & Watts.