3D printing
The 3D printing toolkit for homelab parts: calipers, heat-set inserts and finishing tools
Measure a Pi mount, seat M2.5/M3 inserts and clean up printed brackets. Six tool picks, maker hole dimensions and printer-specific plate care.
OUR PICKS / YOUR SETUP
Find your fit.
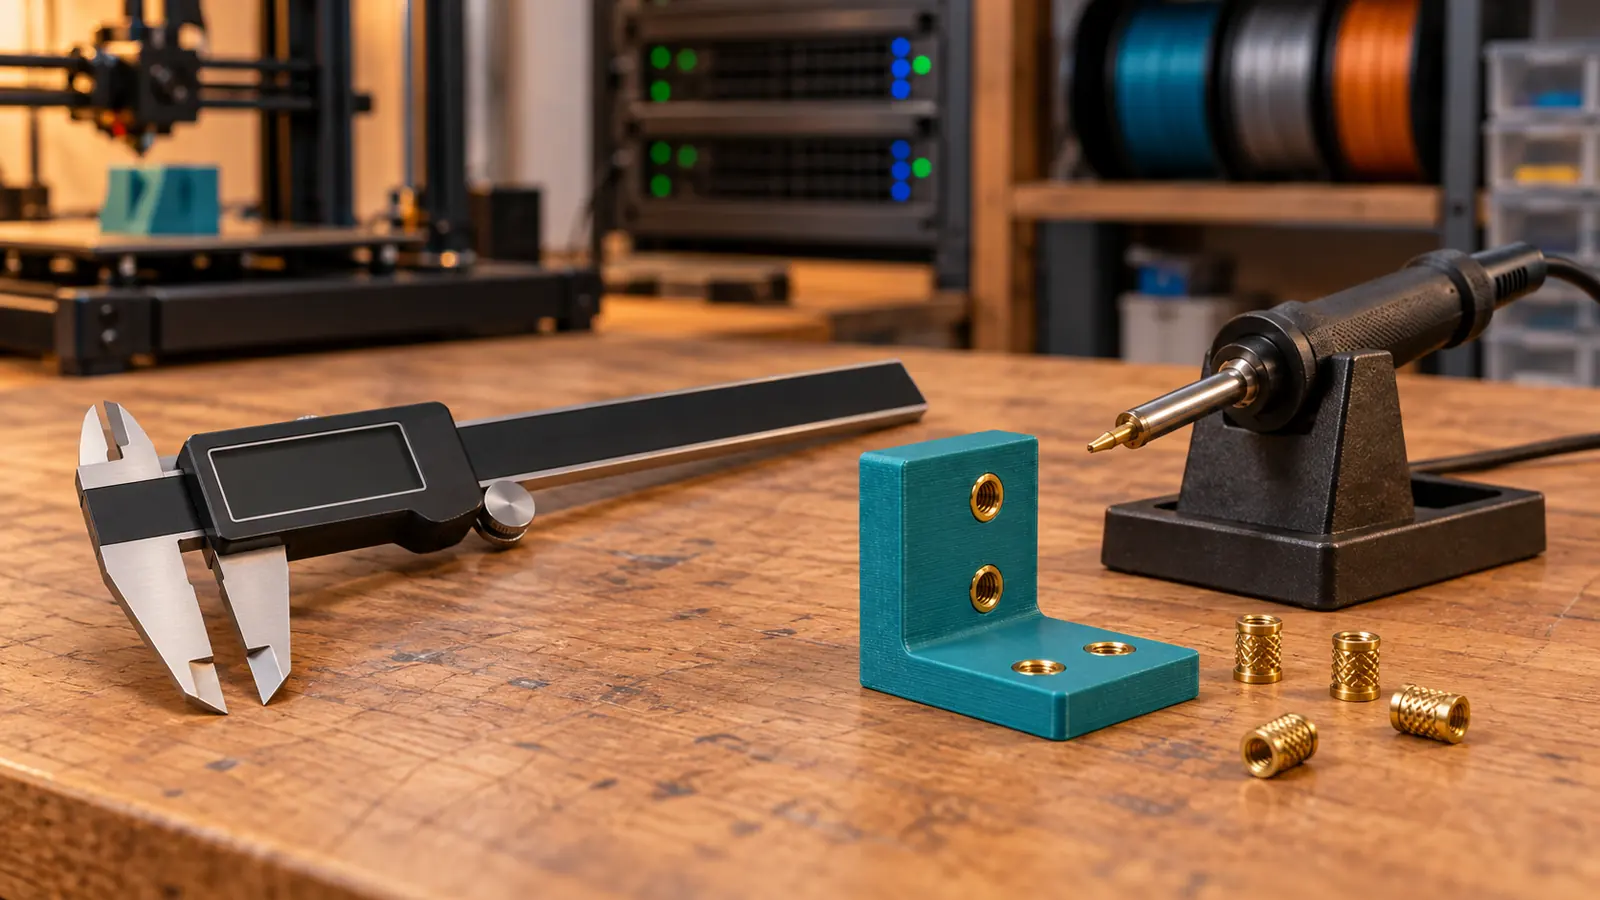
Start with iGAGING calipers and Xuron cutters. Add ruthex insertion tips for a compatible 900M/T18 iron, the exact M2.5/M3 inserts your model uses, and a NOGA tool for rough edges.
- Tool picks6 by job
- Printed threadsM2.5 + M3
- Measure firstThen model
The printer has finished. The bolt still won’t fit. A few good tools turn that almost-right bracket into a part you actually want in the rack. Start with calipers, add reusable threads where a lid will come off repeatedly, then clean up the edges without carving away the fit you just measured.
Tool specifications and installation guidance from the makers, checked October 30, 2026.
A USB or HDMI inspection microscope gives tiny edges and embedded hardware a larger view; keep the calipers for dimensions.
Six picks, each with a job
We earn a commission if you buy through our links — it doesn’t change our picks. How we make money → As an Amazon Associate I earn from qualifying purchases.
| Job | Pick | Why it belongs on the bench |
|---|---|---|
| Measure before modelling | iGAGING OriginCal 100-700-06 | A 0–6-inch digital caliper with metric readings |
| Seat brass inserts squarely | ruthex LOE-SET-012 tip set | M2.5/M3 tips included; needs a separate compatible 900M/T18 iron |
| Add M2.5 threads to a printed board mount | ruthex RX-M2.5x5.7, 70-piece pack | The size missing from the assortment below |
| Add M3 threads to a printed lid or bracket | ruthex GE-KASTEN-001 assortment | Includes standard RX-M3x5.7 inserts, plus M2/M4/M5 |
| Shave an accessible rough edge | NOGA BURR 3 NG1003 | Manual deburring handle with S10, S20 and S35 blades |
| Clip small support remnants | Xuron 170-II Micro-Shear | Slim flush cutter; the maker lists plastic sprue/de-gating work |
You don’t need to buy the whole table to make one cable clip. Calipers and a cutter cover a useful first step; the insert tools earn their place when you’re building reusable assemblies. For screws, standoffs and the rack frame, use the printed homelab parts buy list. Here, the interesting part is using the tools well.
The insert tool is a hot iron: use its stand, wear eye protection when clipping, and follow the enclosure and ventilation guidance for your workspace.
Calipers: measure the thing, then draw the mount
The iGAGING model table lists the 100-700-06 as a 0–6-inch OriginCal, with 0.01 mm / 0.0005-inch reading increments and listed accuracy of 0.001 inch over its range. The number of digits on the display isn’t the tolerance your printer will deliver.
Before opening CAD, write down three kinds of measurement:
- Outside size: board or SSD body width, a connector’s widest point, and the space the part must fit into.
- Inside space: a slot, recess or enclosure opening that needs clearance.
- Depth and offsets: the height of a standoff, screw-head recess, connector overhang and room beneath a board.
Close the clean jaws, zero the caliper and take the measurement again from a second position. Use light contact rather than squeezing a thin printed wall. You’re trying to capture the part’s shape, not flex it until the display agrees with your first guess.
For equal-sized mounting holes, the distance across their outside edges minus one hole diameter gives the centre-to-centre spacing. A maker drawing is a useful second reference: the Pi 5 mechanical drawing marks its mounting holes as Ø2.7 mm. That drawing and the board in front of you are better starting points than treating “Pi-sized” as a CAD dimension.
Leave the USB plugs, cooler airflow and SSD cable bend in the sketch too. A bracket can have perfect screw spacing and still block the cable you bought it to tidy.
Inserts: choose the thread and the receiving hole separately
An M2.5 insert doesn’t go in a 2.5 mm hole. The internal thread accepts the screw; the larger knurled outside anchors in the printed plastic. Put the insert in the printed mount, never in the Pi’s circuit board.
The selected M2.5 pack contains RX-M2.5x5.7 inserts. The selected assortment contains M2, M3, M4 and M5, but no M2.5. That makes the separate M2.5 pack useful for a board-mount project and the M3 inserts useful for a printed lid, enclosure or bracket designed around them.
ruthex’s receiving-hole drawing gives these dimensions for the two exact standard inserts:
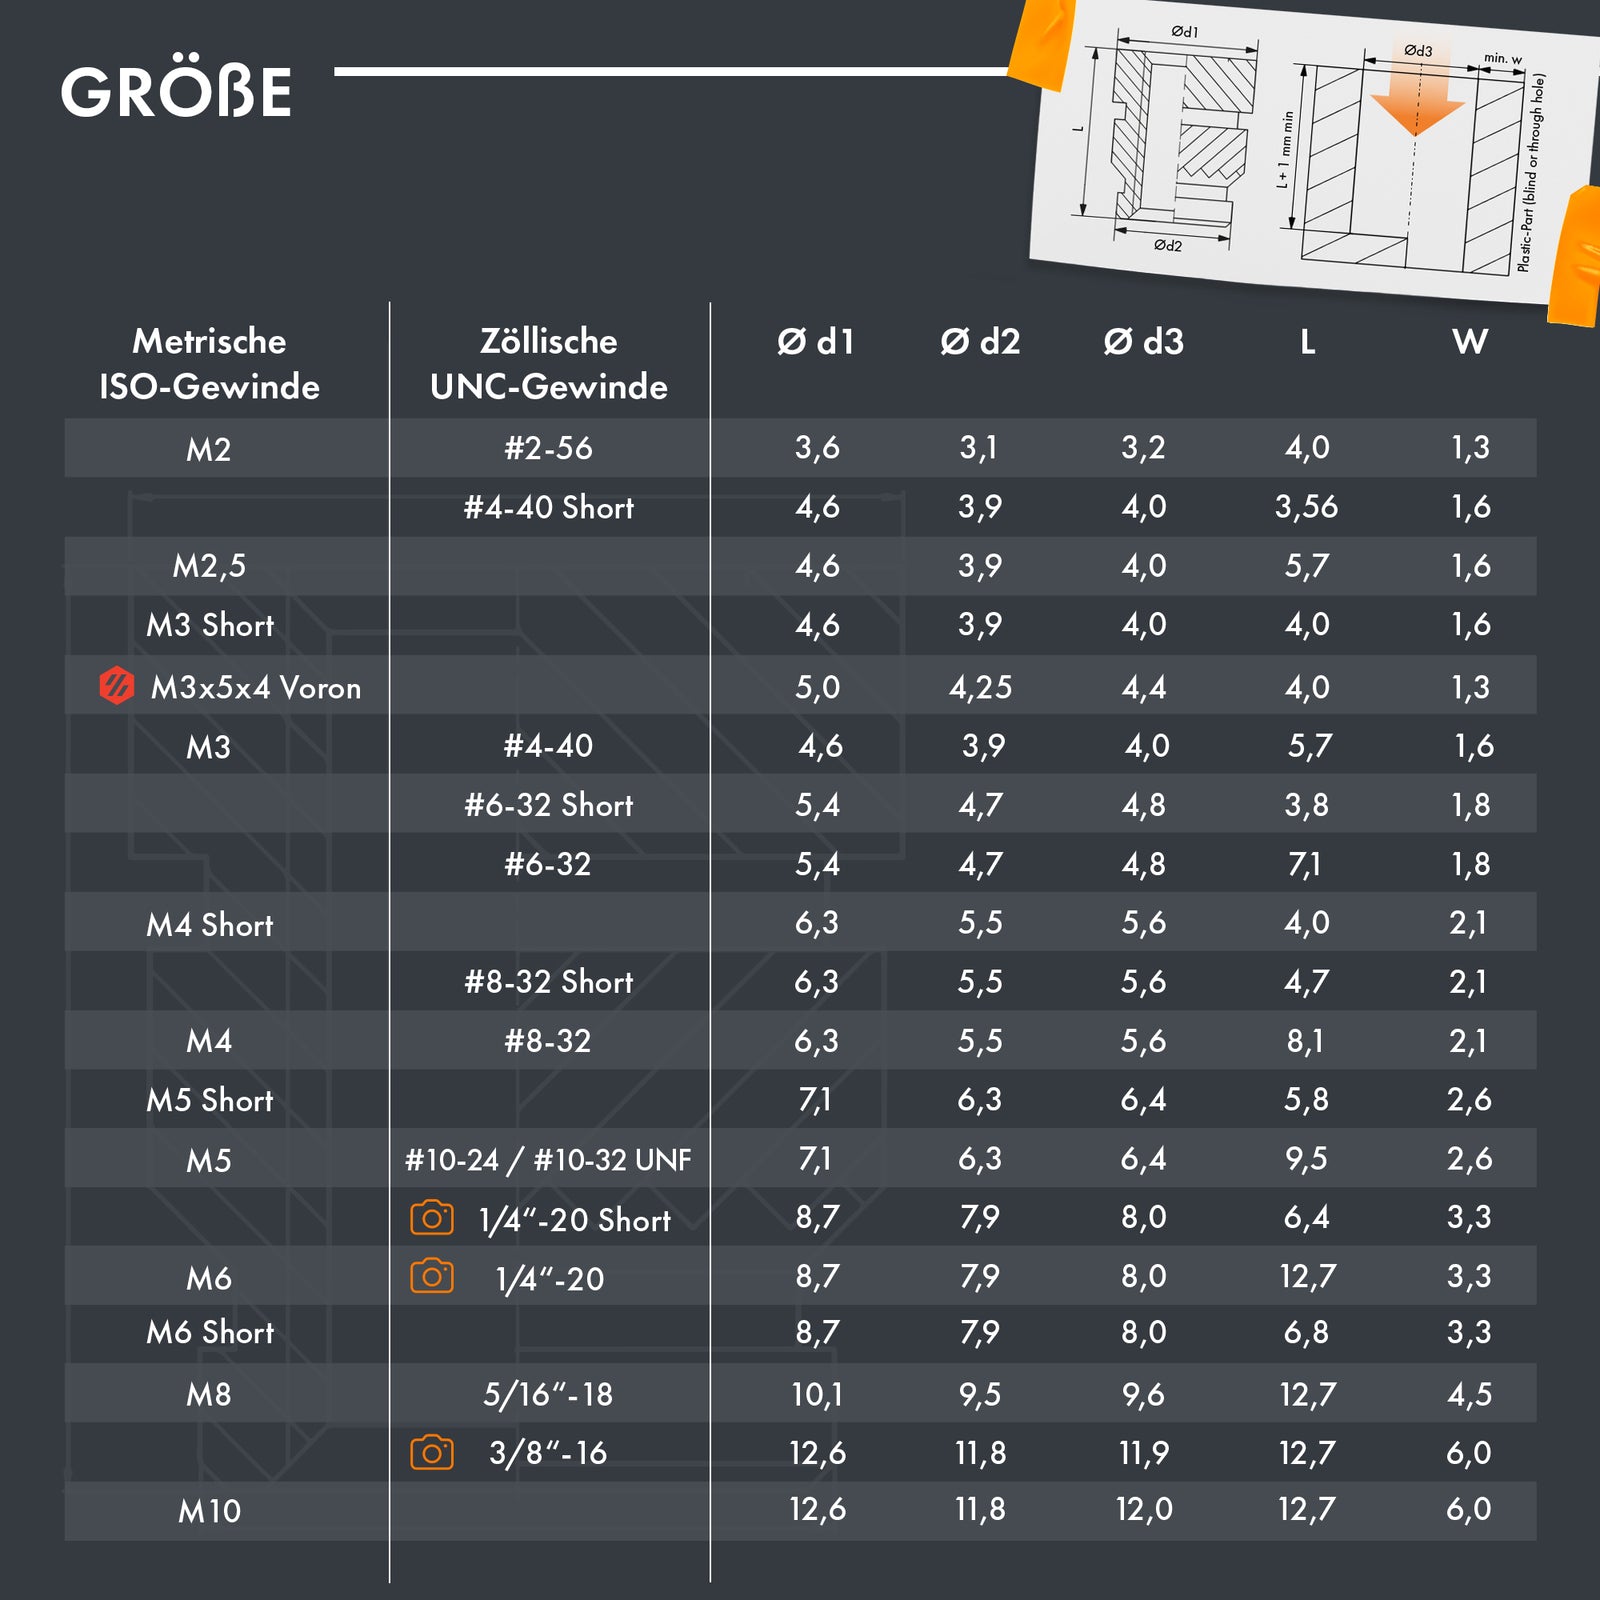
| Insert | Printed receiving hole, d3 | Insert length, L | Minimum surrounding wall, W | Minimum receiving depth, L + 1 mm |
|---|---|---|---|---|
| RX-M2.5x5.7 | 4.0 mm | 5.7 mm | 1.6 mm | 6.7 mm |
| RX-M3x5.7 | 4.0 mm | 5.7 mm | 1.6 mm | 6.7 mm |
The 6.7 mm depth is calculated from the maker’s drawing: 5.7 + 1.0. Leave material beneath a blind hole as well. These dimensions belong to these insert models; ruthex’s short and other M3 variants have different geometry.
Print a small test boss before committing an entire enclosure to the hole setting. A slicer’s hole compensation, material and print orientation can change the opening that comes off the bed. Use the drawing as the target and the small sample to tune your process.
Keep the rack rail fastening separate. M3 inserts join your printed pieces; they don’t replace whatever thread the rack uses. For example, DeskPi lists #10-32 rack-mount screws for its RackMate accessories. Follow the rack’s hardware specification at that interface.
The insert tool: pick the tip, not the pointiest iron
The ruthex LOE-SET-012 has dedicated insertion tips and a 900M/T18 adapter. It is a tip set, not a powered iron. Reuse a compatible iron and stand, or add those before buying the tips; the adapter must match the iron’s tip system.
Choose the tip for the insert’s internal thread. Its shoulder lets you press the insert down squarely without using a pointed soldering tip as a wedge. Set the iron according to the insert-tool and filament guidance, bring the tip into contact and let the heat do the work.
Work in a stable sequence: support the printed part, align the insert with the boss, lower it gently, then lift the tip straight away once it is seated. Let the plastic cool before driving a screw. Start a screw by hand so you feel a crooked thread before a driver turns it into a larger problem.
If the insert sinks sideways, stop and fix the alignment on the sample boss. A hotter iron and a harder shove are poor substitutes for a hole and tool that line up.
Deburring tool or flush cutters? Use both for different leftovers
Use the NOGA for an edge; use the Xuron for a small protruding piece. That simple split saves a lot of gouged brackets.
The NOGA deburring catalogue lists the NG1003 with an NG-1 handle and S10/S20/S35 blades. Its blade table includes plastics for the S10. Start with a light pass along an accessible edge, inspect it, and stop when the burr is gone. Turning a hole into an oversized chamfer doesn’t improve its fit.
Xuron’s 170-II maker brochure identifies a flush cutter and lists plastic sprue work. Use the slim head to clip a small support remnant close to the surface, then finish the edge if needed. Take small bites of support remnants; the maker excludes hardened wire from this cutter’s job.
Neither tool fixes the position of a mounting hole. If the whole pattern is wrong, change the model and print another fit piece. Save the finishing tools for the small leftovers they can remove cleanly.
Build plates and adhesion: follow the surface, not a universal recipe
Keep the compatible plate you already have until you need a replacement or a different finish. Bambu’s Textured PEI page documents separate printer variants, including A1 and A1 mini. Match the exact variant to the machine rather than buying by “PEI” alone.
The same maker page recommends detergent and water for routine surface cleaning. It calls for Bambu’s official glue where glue is required. That isn’t a reason to coat every textured plate before every PLA print.
For Prusa’s standard PEI sheets, the first-layer guide specifies 90%+ isopropyl alcohol and explains when a basic PVA glue stick supplies a separation layer. On smooth PEI, materials such as PETG can grip too strongly; glue can help the part release rather than simply make it stick harder. Follow the sheet-and-material combination in that guide.
A bracket’s last trip across the bench
| What you find | Useful next move |
|---|---|
| The screw pattern misses the hardware | Measure again and correct the model |
| A tiny support nub keeps a face from sitting flat | Clip it with the flush cutter |
| A sharp accessible lip catches a cable | Deburr lightly, then inspect the edge |
| A lid will be removed repeatedly | Design the boss around the exact insert drawing |
| The first layer starts lifting | Clean and prepare that exact plate according to its maker |
Choose the filament for the job, measure the hardware, print a small fit piece, then finish and assemble it. That’s a more satisfying toolkit than a drawer full of mystery accessories—and a much shorter route from “nearly” to “fits.”
Sources & methodology
Where these facts come from.
- iGAGING — OriginCal model table · checked October 30, 2026
- ruthex — LOE-SET-012 tip and adapter compatibility · checked October 30, 2026
- ruthex — RX-M2.5x5.7 pack and dimensions · checked October 30, 2026
- ruthex — GE-KASTEN-001 assortment contents · checked October 30, 2026
- ruthex — receiving-hole and wall dimensions drawing · checked October 30, 2026
- NOGA — deburring tool and blade catalogue · checked October 30, 2026
- Xuron — 170-II maker brochure (TestEquity copy) · checked October 30, 2026
- Bambu Lab — Textured PEI fit and surface care · checked October 30, 2026
- Prusa — surface cleaning and glue separation layer · checked October 30, 2026
- Raspberry Pi — Pi 5 mechanical drawing · checked October 30, 2026
- DeskPi — RackMate rail screw specification · checked October 30, 2026
Source dates are listed above.
As an Amazon Associate I earn from qualifying purchases.
Parts from this article
The gear, on Amazon
The models recommended above, with the specifications that matter for your choice.
Measure the fit
iGAGING OriginCal 100-700-06 caliper
Measure holes, brackets and the part you are replacing before opening your CAD sketch.
Install the inserts
ruthex LOE-SET-012 insert tip set
Use the matching tip to seat your inserts straight with a compatible iron.
M2.5 printed mounts
ruthex RX-M2.5x5.7 inserts, 70 pieces (GE-M25x57-001)
Add M2.5 threads to printed mounts designed for the RX-M2.5x5.7 insert.
Reusable screw threads
ruthex GE-KASTEN-001 threaded insert assortment
Add metal threads to a printed lid or bracket that you will open again.
Clean printed edges
NOGA BURR 3 NG1003 deburring tool
Use a manual swivel-blade tool to remove accessible edge burrs in controlled passes.
Trim supports and sprues
Xuron 170-II Micro-Shear flush cutter
Trim small plastic sprues and support remnants with the slim flush-cutting head.
Prepared by Racks & Watts.